Saturday 26 January 2013

Australia Day 2013 & 1974

Unfortunately, this was the extent of my Australia Day activities this year.
For the past few years I have attended the Brisbane Bayside Restorer's Australia Day Rally, but due to the weather the Capri didn't leave the garage.
Talking about the weather, we found these pictures of a flooded Capri in the Capri Club archives. It was during the famous Brisbane 1974 floods and is on Coronation Drive, Toowong. If you know anything about this car (It looks like a 69GT), I would like to hear from you.

Monday 21 January 2013

2013 Burton Power (UK) Catalogue

 I received this in the mail today & it has a huge amount of information about classic Fords. Some of you may have received it previously but it is a first for me & will be a great reference book for parts.


Sunday 20 January 2013

A brief history of my 1972 Capri XL


I have owned the Capri for twelve years after buying it for $2300 from a young guy living in the Bayside suburb of Ormiston. I wasn’t particularly after a Capri but after I saw this one and it was all there, still registered and had a sports steering wheel that I really liked, I took the big plunge. I don’t know a lot about the history of this car other than the previous owner had it for a relatively short time after purchasing it from another Bayside resident who had owned it for sometime. There is a suggestion that it may have been a prize won in the Miss Australia Quest when these were in vogue in the 70s. I have tried several times to find out more about its past but I haven't been able to get past the previous owner, despite a Transport department search. What I do know is that who ever did own it had several young children as the back seat and parcel tray had numerous holes resulting from child restraint buckles and clips. It is also one of only 171 XL Auto models built in 1972 and cost about $3390.
My Capri has the 1600 GT engine and auto transmission (not my preferred option) and apart from a sports air cleaner is stock standard. In fact, the engine is the only area of the car which hasn’t required any major attention, but I am saving! Over the time I have had the car, I have reconditioned or refurbished many items eg. front suspension, auto transmission, diff, brakes, Weber carbie, radiator, alternator, interior carpets, parcel trays and had some of the seats redone. My biggest expense was the rust removal and repaint job (Ford Winter White) done in 2003. I knew that restoring cars was a wallet lightening experience, but I didn’t realise quite how much until I recently totalled the receipts with the final tally a bit of a shock and remains known only to me!
Having done most of the hard work, I quite enjoy driving the Capri and my adult kids often want to take it for a spin. It was used for several years as a daily driver over a short distance and I am quite at ease driving it in city traffic. It has been reliable and is economical to run, even using premium unleaded fuel. It is relatively easy to work on and most parts can be obtained with a bit of a chase, I have enjoyed the restoration process, have measured up the garage and I think another manual Capri might just fit – but there is a significant family member to convince. Dream on, I am told! (I wrote this little article a few years ago & now I have the second one in the garage!)
 

Saturday 19 January 2013

An Intro into my 1970 Capri 1600 Deluxe


I bought the Jewel Green 1970 1600 Deluxe in October 2008 after it was advertised on EBay for 30 minutes. It was a local car (Brisbane) and I was very lucky with the condition of the car. I was also very fortunate that I was able to trace its original owner for 37 yrs. & be given the original sales docket for the car. This was really useful as any official records from the Ford Motor Company result in no knowledge of this vehicle. One of the most difficult things to replace in the restoration was the front right guard. I final sourced a fibreglass one & after several attempts to fit it correctly, you really can’t notice the difference. I was really happy with the new paint job & the colour is great. The complete restoration process is documented in my other blog site and if you want to find out all about my problems, then have a good look at:
Towards the end of last year (2012), I reconditioned the engine & the gearbox. I will document this rebuild later in this blog. I really like driving this car & it is far more fun to drive than the automatic XL. The body is very rigid with no rattles & it is obvious that it has been regularly maintained throughout its lifetime. The one thing that I would like to improve is the brakes and whilst they aren’t bad, they are nowhere near as good as those on the white XL. It is a great club car and I have tried to keep it as original as possible.


Saturday 12 January 2013

Jewel Green Engine Reno - 1


For some time now, in fact the last year, the Capri has been leaking oil quite badly. From all my investigations it would appear to be the engine rear oil seal so it was a major job & one that I have kept delaying. In addition to that, on several occasions I have noticed blue smoke coming out the exhaust & I put that down to overfilling the sump. Also the clutch has been rattling & lastly, the gearbox has never had synchro on first gear. So, a few things needed to be done & these all required the engine & gearbox to be removed. Two years ago when I first did up the JG Capri I spent a lot of time on the top of the engine but didn’t ever attempt a full engine overhaul.
Anyway, all my delaying tactics were jolted when I saw that Super Cheap was advertising a 1250kg engine crane for $190 or half price. The car Gods were giving me a message! What a good Father’s Day present! So after spending a morning putting it together I had no real excuses. This is the monster that really started it all!

3/9/12
I actually started.  I spent a fair bit of time ensuring that I could get the engine out of the car with the crane whilst it was under my house. All my calculations indicated that it would be fine. So, then to finding the best lifting points & I decided to go for the front inlet manifold bolt & the rear exhaust manifold bolt. Before I did anything else, we took the compression readings for all cylinders. The back three all registered about 120 & the front cylinder was a bit less than 100. Not real good! That means new rings will probably be necessary but we will wait & see. Next came out all the hoses, radiator, carbie linkages & then both the manifolds. I decided to take the engine & gearbox out separately as I was concerned about the angle & height in doing both at the same time. Maybe, I just should have removed them together. When I was at the stage of hoisting the engine out, the first problem appeared. Even with the boom fully extended, the crane legs would not quite fit under the stabiliser bar so I had to jack up the car & put it on stands. With the help of my neighbour, KH, the engine finally came out & with the help of the crane, it was quite easy.

Friday 11 January 2013

Jewel Green Engine Reno - 2


 4/9/12
Today, I spent most of the morning getting out the gearbox & removing the bell housing. It all went fairly easily except everything I did to try & stop the oil coming out the rear of the gearbox didn’t work so I had oil everywhere & that took ages to clean up. I don’t know why I didn’t drain the oil first! In fact I had to hose out the garage floor. Having both out parts out, it was very obvious that it had been leaking oil for a considerable period of time.
10/9/12
Next, I dismantled the clutch & noted that the most of the parts are worn & I will possibly need a complete clutch assembly. Then the flywheel came off & then the sump. I had difficulty trying to find the best way to work on the engine & I still have not found the most ideal stand.


Thursday 10 January 2013

Jewel Green Engine Reno - 3


12/9/12
The pistons came out today & it was quite interesting that No1 piston, the one with the low compression reading had a broken top ring as did the next, No 2. I am glad we decided to go the whole way & who knows how long they have been broken for or whether I had broken one on its removal. The back two piston rings were intact. The bores look OK & the pistons seem good enough to reuse but they need a good clean up. The pistons have +060 marked on them so that might prove interesting in getting them replaced.   This afternoon, I got the Karcher fired up & cleaned all the bits – the block, gearbox, bell housing, sump & various other bits. More cleaning still to be done & then it is chasing up parts. I still need to see how to remove the rear seal.

15/9/12
Removed the real oil seal cover & then removed the seal which was split in one section so that really was the cause of the oil leaks. Then I removed the front oil seal cover but getting the seal out is a different story. I am going to have to find a suitable tool to slowly & carefully drive it out. I then cleaned all these parts & checked that the new seals that I had bought from England some months earlier fitted & they do.


Wednesday 9 January 2013

Jewel Green Engine Reno - 4


17/9/12 J from Gabba Gearboxes rang to give me the good news. All the synchro rings are stuffed & the cluster gear shaft needs to be rebored but he is unable to locate any synchro rings. So what is one to do? I indicated that I thought I might be able to locate the rings in the UK & I would come in & see him this afternoon to check what is required. I cleaned up the pistons & removed the old rings. The same was done with the clutch cover & plate. I then checked out the Burton’s UK site & located a set of synchro rings for a Type 3 gearbox but I was not sure if these were what were wanted. I also located some piston rings which seemed to be the correct size. Anyway, the next stop was Autobarn at McGregor as they had been very helpful before with all my strange requests. After a bit of ringing around they located a set of piston rings & then a clutch kit. Both of these should supposedly be ready tomorrow. Not bad for a 42 year old engine. They are very helpful. Then I drove over to Gabba Gearboxes & they explained what had to be done. All a bit more expensive that I thought but isn’t that always the case?  In fact, it will cost me my allowance for the next three years! The synchro rings should be correct so I have ordered them & after paying a fair bit for postage they should arrive in 3-4 days. We shall see but that means if all the parts are correct I should be able to starting getting it all back together very soon.18/9/12 Today I spent more time cleaning various bits (flywheel, sump, gearbox support) & the main block. With the help of KH, the front oil seal came our fairly easily if you knew where to hit it first. B from Autobarn rang to say that the parts had arrived. That is a very prompt service. They are very good. I picked them up this afternoon but I have not checked them.  J also rang about the gear box & gave more good news about the price of the rebore. Well, the gearbox better be good when it is finished. In fact, it is more expensive than a new Chinese car!24/9/12 Today I fitted the flywheel back on & then started with the clutch. When I took off the old clutch assembly, it was held on by three bolts yet all the books suggest it should have 6 bolts. So I spent a fair bit of time cleaning up the threads where the others went & cleaning the flywheel surface. Gabba Gearboxes also rang to say they had finished the gearbox so I went and collected that & on the way back picked up an oil filter at Repco for $3.50 and some new bolts for the flywheel at Supercheap. I also removed the old clutch bearing & pressed on the new one. The reverse switch is a bit of a worry as there is no way to test it or maybe there is.

26/9/12 Bolted on the head & installed the tappets. I spent a fair bit of time adjusting the clearances & then gave the whole block another spray of black engine paint. I cleaned the exhaust manifold, the engine mounts & the fan. I then sprayed them & attached the fan. Also, I put on the thermostat housing so there is not much more I can reassemble until I get some silver paint. All that new black & silver paint should make it run even better!  Nearly all there & I should have it back together next week & in the car.


 The final section (Part 5) is shown in the older posts.


Tuesday 8 January 2013

Jewel Green Engine Reno - 5


10/10/12
 
Today, the radiator went in & all the cooling hoses. Then all the fluids, oil in the gearbox & engine & water. The sump plug still has a small leak which meant that I took it out & used a thinner washer & more plumbers’ tape.  Then the battery & the motor turned over without any strange noises which was good.  I then put the plugs in & the distributor & ignition leads. Had a go at starting & no go. No petrol so I blew & sucked the fuel lines & there is fuel after the pump. I had to spend a lot of time with the leads as I had not numbered them & had I done that it would have saved me an hour. I was thinking that the rotor moved clockwise & arranged the leads that way. After many goes at starting, I then read that the rotor went anti-clockwise. It soon went with the leads in the right order. What a silly old bugger! Again, you think you know how it is done & then the simple things like this can be so frustrating! However, large amounts of oil were coming from the filter, not unexpectedly. I was not sure what to do but found the original Motorcraft type on eBay, so I bought it. In the meantime, I used my largest set of stillsons & managed to tighten the filter up quite a deal & it doesn’t seem to be leaking. After a few more turns she fired up & sounded pretty quiet. No obvious other leaks! I then had to refill all the oils & water & did some adjustment on the clutch. The gearbox works & reverse actually has spring mechanism so all seems good so far. The exhaust manifold has a small leak & I will need to tighten that in the morning but everything seems pretty good which is a relief.
12/10/12
 
I couldn’t do too much yesterday because of the weather but today, I redid the exhaust pipe to the manifold & it has a very small crack so I put some exhaust putty on it & retensioned it.  It started well & then cut out. It didn’t seem to want to start & the quick way it was turning over suggested that it might be the cut out switch from the coil was on. Some of the connections from the distributor to the coil via the switch were a bit iffy so I redid them all. Then it fired up really well & again sounds really good. It was time for a short drive around the streets near home & all seemed good. Having synchro in first gear takes getting used to but it went up the mountain & pulls strongly. It seemed to be running a little hot but possibly needs more water. Again, I am pretty pleased at how it is going.


Looking back, what were the observations of this little exercise?
1.       The engine crane started all of this and it was well worth the price paid. It is an extremely useful bit of machinery and meant that this aging guy with a not so good back didn’t do any heavy lifting at all. I like the way it folds up & takes little space in the garage. Also, when I am finished with it, I can sell it, possibly for the same price as I bought it or a profit! Anybody want one?

2.       Don’t believe everything that seller’s tell you when buying a car. I was informed, when buying this car, that the original owner had just spent a lot of money on reconditioning the engine. What a lot of crap!

3.       I should have done this much earlier. It just takes times to get motivated & I was a little apprehensive about my level of skill but with the help of my learned neighbour, I was able to do all the engine work. My last attempt at engine reconditioning was in 1967 when I put new pistons & rings in my FE Holden. From memory, I had a lot of trouble getting it to run because the timing was way out. Having no timeline also is a great help. In other words, I could take my time & tried not to be rushed into finishing it.

4.       Good tools are essential. I had most things but a new piston ring compressor made everything much easier. The price of tools is much cheaper than in previous years so it pays to have a good tool kit.

5.       I possibly should have taken the engine & gearbox out as one unit but the height under my house is a bit restrictive so I took the safe option. I was able to use a low trolley & the crane to remove the gearbox so it wasn’t a big drama.

6.       Just make sure you drain the oil before you remove the gearbox. I knew that it would drain out the rear of the gear box when I lifted it but I made an absolute mess of the garage floor. There was gearbox oil everywhere so much so that I had to clean & hose the floor but then the strong smell of the oil was around for days. There was also a lot of advice from the household cleaning expert.  A big mistake! I will remember it for next time, if there is ever a next time!

7.       The Karcher is very useful for cleaning the garage floor & also for cleaning engine parts, the block & sump.

8.       Autobarn at MacGregor have always been very helpful to me with getting parts. Barry, the parts man, had located the correct rings (+60 thousand) & a new clutch with two phone calls & had them at their store the next morning. Very good service!

9.       The cost of reconditioning the gearbox was way beyond my anticipated cost. All I wanted was the synchro on first to work but, as with old cars, it wasn’t as simple as that. In addition to all the normal new bits, one of the main shafts needed machining at both ends & that cost a few green ones. Also the fact that I had to source the synchro rings indicates that some parts a little hard to get.

10.   The availability of the synchro rings and the speed at which they arrived from England was a big recommendation for Burton Power. This where the power of the internet meets the need of the classic car restorer. Who would have thought that when these Capris were built, would we be able to sit in our homes, search for what we want, order & pay for it & it arrives by a courier a few days later? To be here in four days was outstanding. I would certainly recommend them for the hard to get Ford parts.

11.   Gaskets, seals & cables, including postage, are much cheaper bought over the internet from the UK.

12.    Oil filters for the earlier 1600 Kent motors can be a problem as they can leak badly if not tightened. There is a ridge on the oil pump which prevents some brands of filter from fitting properly. I have found that the Repco or Motorcraft filters fit best.

13.   Check carefully when fitting new parts. The old clutch assembly was held with three bolts whereas the new part was a six bolt job. On looking carefully at the flywheel, there were six threaded holes where the new assembly would fit so it was clear that someone had taken a short cut on a previous clutch repair.

14.   Just be certain which way the distributor rotor turns or take plenty of pictures of where the ignition leads go. I have put the distributor cap together with leads on many times but, this time, for some reason, maybe age & stupidity, I got it mixed up. After changing leads & mucking about for about 45 minutes, I realised my error & with everything the correct way about, it fired up first shot.

15.   For a normal radiator water additive, I would not use Bars Leaks. May be it is to stop leaks but the water looked like mud. I drained & flushed it all out & used a normal additive which, at least, looks a lot better, and the car is running at a suitable temperature.

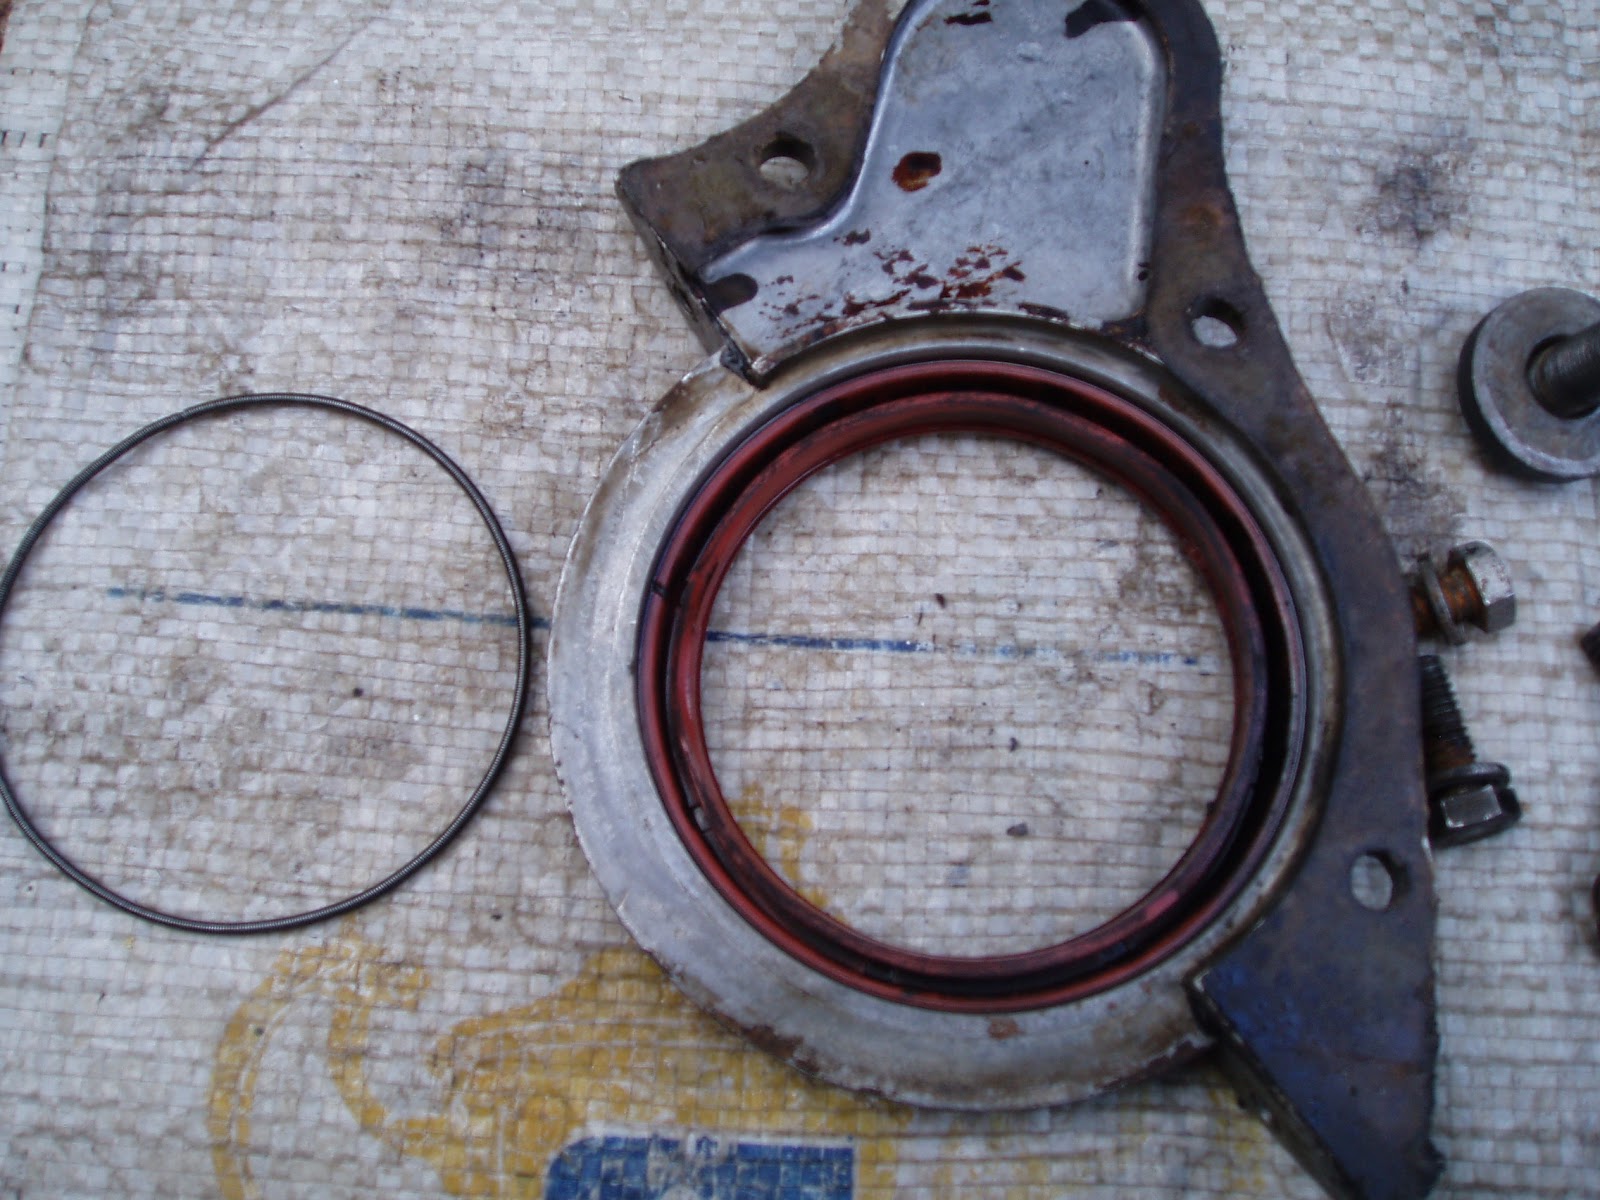
16.   Finally, check for leaks. I had three minor ones. The sump plug (oversize), the oil filter & the rear gearbox seal. A little more tightening & some special magic silastic had solved these & I am pretty pleased with the result.
At the moment, the car is running really well so I am pleased with how it all worked out and I will probably do the same to my white XL sometime this year.

Monday 7 January 2013

1600 Parts List

This is my parts list & if you have some additions, please let me know.

 CAPRI 1600 & 1600GT PARTS LIST


Air cleaner (Ramflo)              RF6585
Air filter                                  A232 (Ryco); WA232 (Wesfil)
Antenna-Top Guard Mount   Aeropro AP30
Ball joint boot kit                    Repco TE2
Brake Seals                           Girling 64320874  VP22
Bumper Bar Bolt Kit               BB1011 (Rare Spares-HZ Holden Ute)
Carburettor Rebuild Kit          FD300 (Ford Carb); WE-800X (Weber)
Clutch Kit                               Exedy FMK-6098
Clutch throw out bearing        FKG 6W 15057
Condensor                             GL103 (Lucas)
Disc brake pads                     DB625BS(Bendix); DB525 (Bendix); ZB525S (Zircon)
Distributor cap                       GL278 (Bosch)
Distributor rotor                     GL256 (Bosch)
Extractor gasket                    SP100801
Fan belt                                 11AO785 (Bosch)
Front engine oil seal              Repco PR6342
Front wheel bearings            1922/1988 & LM11949/LM11910
Fuel filter
Fuel pump                             G448 (Goss); FPM-049 (Fuelmiser)
Fuel pump diaphragm kit      199VC (Goss)
Gasket set – head                 FHS.750 or CH.750; CH750MT (Monotorque, ACL)
Gasket set – bottom              FCS.750 or FH.750  
Headlight                              1059 (Hella); VG-VH Valiant H4 Halogen; Hillman
                                              Hunter; Torana LH

Indicator flasher                    Tridon HD12
Ignition coil                            Bosch GT40R
Ignition leads                         TG 4022 (Eagle), Bosch 4044i
Oil filter                                  AFLE227(Motorcraft); VO32 (Valvoline); Z62 (Ryco);                                                            ROF-22 (Repco)
PCV valve                              SS502 (Dufor)
Points                                     GL19V (Lucas); GF82V (Autolite)
Piston rings                            Grant BR1040.(60)
Rear brake linings                  E1169 (Zircon)
Rear brake shoes                  SBS1750
Rear engine oil seal               Repco PR7174
Rear shock absorbers            82022 (Munro, Gabriel); 8046 8046 (Pedders);
                                               42149 Hyd-Air; B46-0763 (Bilstein)
Spark plugs                            W6DC(Bosch);BP6ES(NGK); BPR6EIX (NGK Iridium)
Starter solenoid                      SW3, Ingram 9557
Throttle cable                         487 (Alexander-UK)
Tappet cover gasket              JM478EZ (ACL)
Thermostat                             TT1-192 (CPC); Gasket TTG4 (Tridon)
Thermostat Housing               WO3 (Kilkenny Castings)); Gasket GK3
Top Radiator House               05-0108 (Gates); 05-0108 (Mackay)
Water pump                            PWP181 (Protex); WP730 is also listed but may not fit